.
Handling a complex scene in a few seconds per frame, using the command line
Many factors are decisive when you try to improve the performance of a Realflow simulation. Small simulations can be processed in a few minutes but large scale simulations (like massive fluids, natural disasters, seas, etc) may take many hours, and even days, although we´re using high end workstations. Of course, depending on the complexity of the scene, with special attention to the collision objects (never use final geometry, be sure to use simplified low-poly proxies), and resolution of the fluids, and many other parametres like viscosity or surface tension may affect seriously the time of the whole process.
One of the most important factors is the 'MAX Substeps' parameter: to decrease the 'MAX Substeps' can help us to make really faster simulations. By default, the 'MAX Substeps' is set to 333, however we rarely will need this level of accuracy, so we can reduce this value drasticly. Usual and simple simulations (pouring fluids on a vase, waterdrops, etc) may demand some values between 80 and 60, or even less in many cases. You can test your own values, but remember that extremely low values may affect and distort your fluid behavior, and your scene will become unstable: our aim is to seek a value in an equilibrium point between stability and and fast-performance. To change the 'MAX Substeps' value, simply go at the bottom-right corner and access the down arrow (sub-menu) located at the Simulate button > Options: Now you can change the 'MAX Substeps' to the desired value:
 Bear in mind you also can change this value in File > Prefrences > Simulation.While we´re running a simulation, we can press Alt D to disable the viewer. Realflow keeps calculating the simulation, even though we can not seet it. To bring back the image on the preview, we just simply press Alt D, again.
Disabled viewer
Using the command line is the fastest way to calculate simulations in Realflow, by far. This method allows the computer to manage strictly the calculation process without launching the graphic user interface (GUI), calculate previews, etc. Definately is the best way to run complex simulations. The workflow is to launch the GUI program as usual to prepare the scene, set the fluids and objects parametres, daemons, contrtaints if needed, etc. and finally save the scene (*.flw file) we will use later. Once the scene is saved and Ralflow closed, this is the way to launch your command line simulation, following these easy steps:WINDOWS:1.º Go to Windows logo at the bottom-left corner (Start in XP), and type cmd in the search field. ('Run' option, in Windows XP). A command prompt window will pop up: 2.º Go to the folder where realflow.exe is installed; for instance, introduce (in my case):
cd\Program files (x86)\Next Limit\x64\realflow4\
...or drag and drop the folder directly on to the prompt window (in Windows XP). Something similar to this must appear: 3.º Now type the following command (where the # symbol is the number of available threads in you computer and the .flw is the path to the .flw file you recently saved):
realflow -nogui -threads # c:\your_path\test01.flw
in my case is c:\Users\Victor\Documents\RealFlow\test01\test01.flw Then we hit enter, and the simulation will start immediately on command line mode: all active nodes will be calculated. Please note in this example we´re calculating all the process and active nodes in the scene, but there are many flags to calculate determinate actions, for instance: only build meshes, only a range of frames, etc. You the command list in the Realflow Help > Contents > RF4 > Command Line > Win, Linux, Mac...MAC OS X1.º Open a Terminal shell. Terminal is located under /Applications/Utilities/ folder.
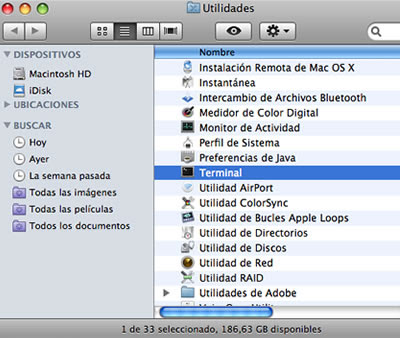
2.º With active terminal, press Command key while clic over the Realflow application in the Dock, then Mac OS will expand a new window with the located Realflow Package. We simply navigate into the Realflow Package and locate the file: Contents/Mac Os/realflow. We select the file 'realflow' and drag and drop it on to the Terminal shell, and then we add the desired flags, for example: -nogui (to run the application without user interface), -threads # (where # is the numer of maximum threads in our machine), -mesh, -frames, etc.
Clic on the image above to enlarge
3.º Then, we finally locate the .flw file to simulate and drag and drop it to the Terminal shell, so we´ll have something like this:/[path_to_rf_application_folder/Contents/MacOs]/realflow -nogui -threads # [path_to_flw_file_folder]/name_of_file.flw
Remember: # is the number of available threads in our computer. In my case the whole command is:
/Applications/realflow.app/Contents/MacOS/realflow -nogui -threads 4 /Users/Victor/Documents/RF/test01/test01.flw
Then hit enter, and enjoy!. As mentioned before, at the end of Windows section, bear in mind we have a lot of different commands to simulate determinate actions (meshes, frames ranges, etc).P.D.: Thanks to Next Limit Team for his patience, help and support.